 COPIER
How to Scan Art and Drawings (Phone or Scanner)
To scan art, use a flatbed scanner for flat drawings up to its glass size, and your phone for everything else: lay the piece flat in even light, shoot it straight on, and choose a look that suits the medium. Pencil and watercolor want the paper whitened but every gray kept; ink line art can go to pure black and white; paintings should keep their colors untouched. The wrong filter can erase half a sketch, so check the faint lines before you save.
Which look to use for each kind of art
Scanner apps and scanning software offer some version of three looks: no change, a color cleanup that makes the paper white, and black and white. Here’s how they suit different media.
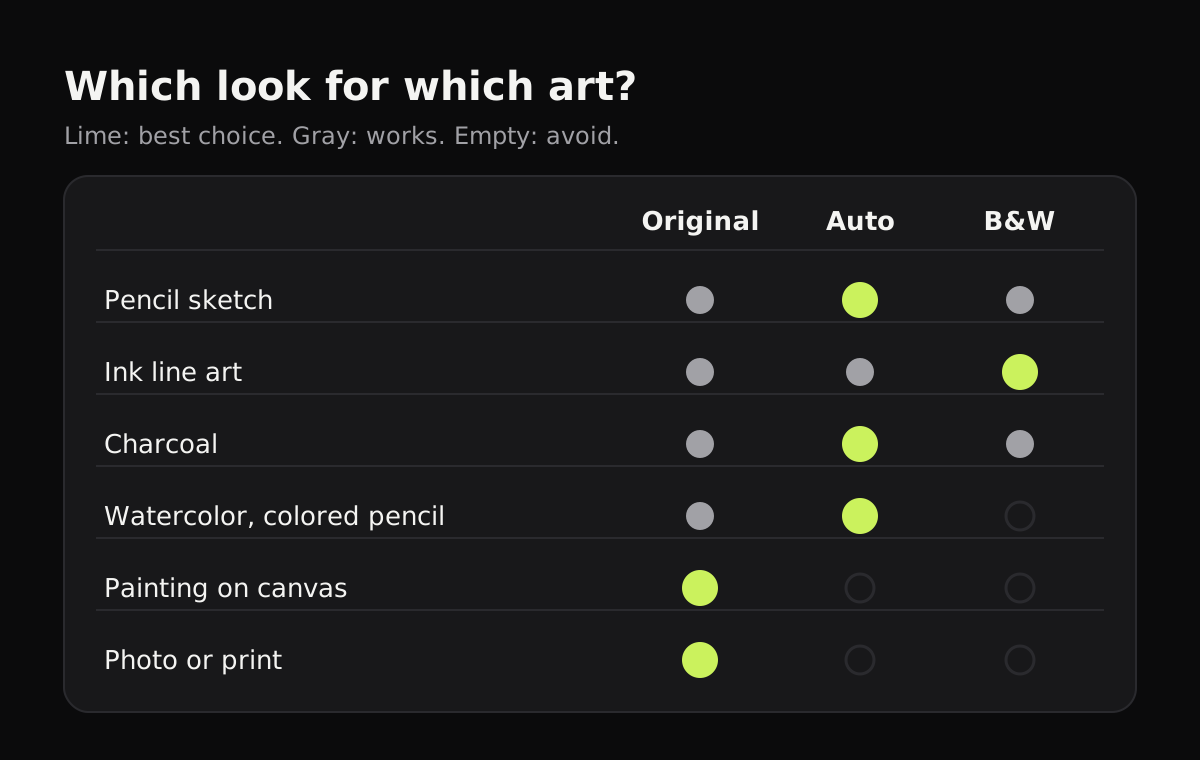
The same advice in more detail:
| Art | Best look | Why | Flatbed DPI |
|---|---|---|---|
| Pencil sketch | Color cleanup (Auto) | Whitens the paper and keeps every gray stroke | 600 |
| Ink line art, comics | Black and white | Pure black lines on pure white, easy to color digitally | 600 to 1200 |
| Charcoal, pastel | Color cleanup (Auto) | Keeps soft gradients; black and white turns them blotchy | 600 |
| Watercolor, colored pencil | Color cleanup (Auto) | Removes the yellow cast of indoor light; lower the strength if pale washes fade | 600 |
| Painting on canvas or board | Original (no filter) | No paper to whiten; filters shift colors | Photograph instead |
| Mixed media with texture | Original | Cleanup filters can flatten texture and shine | Photograph instead |
DPI here means the scanner setting. 300 dpi is enough to post a drawing online. 600 dpi lets you print at the original size or a bit larger. Line art you want to clean up or turn into vector shapes benefits from 1200 dpi, because edges stay smooth when you zoom in.
How to scan a drawing with a flatbed scanner
- Clean the glass. Dust and eraser crumbs show up on white paper.
- Lay the drawing face down and close the lid gently. Put a sheet of black paper behind thin paper so drawings on the back don’t show through.
- Choose color mode even for a pencil drawing. Grayscale is fine too, but avoid “black and white” or “text” modes, which drop light strokes.
- Set 600 dpi and turn off auto-enhance, sharpening and descreening.
- Save as PNG or TIFF if you’ll edit it, JPG if you’ll only share it.
If the paper looks gray in the scan, adjust levels in an editor: drag the white point in until the paper is white. That’s essentially what a scanner app’s color cleanup does for you.
How to scan a drawing with your phone
A phone is often the better tool for art: no size limit, no lid pressing on pastel, and it’s always with you.
- Use soft, even light. Daylight from a window, out of direct sun, is ideal. Two lamps on either side at about 45 degrees work at night.
- Turn the flash off. It makes a hot spot in the middle and flattens texture.
- Hold the phone parallel to the paper, directly above its center. A scanner app corrects small tilts, but a big angle stretches the drawing.
- Fill the frame. Leave only a small margin around the paper.
- Pick the look and check it against the original. Light pencil and pale watercolor washes are the first to go missing.
Scanning art with Copier
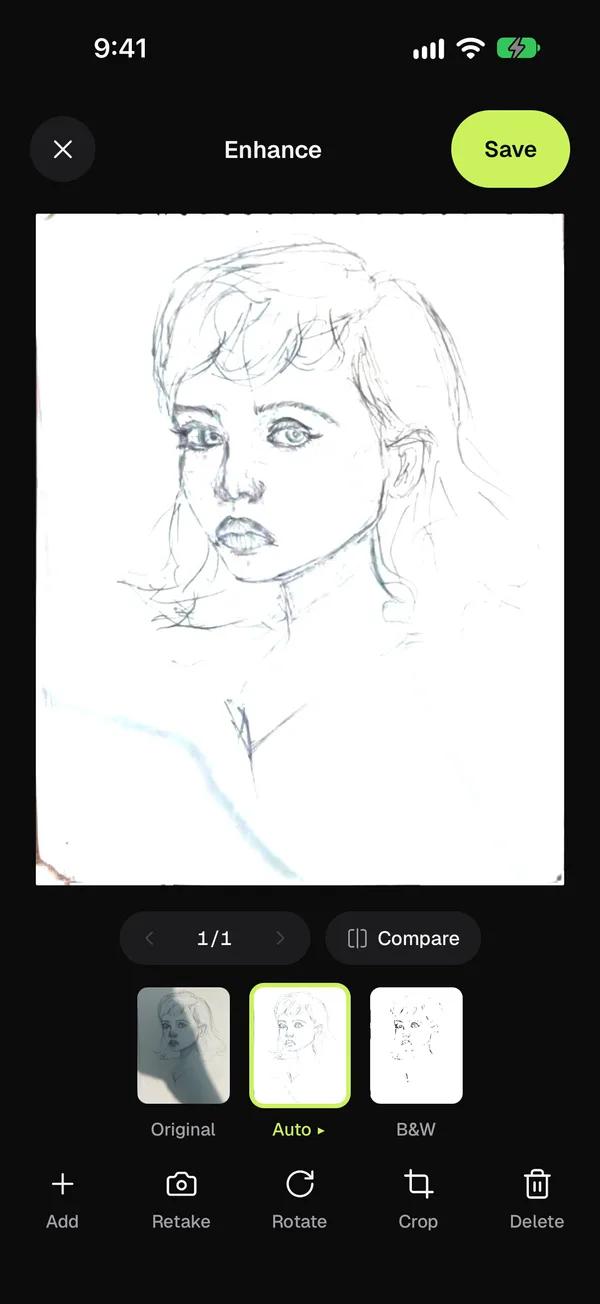
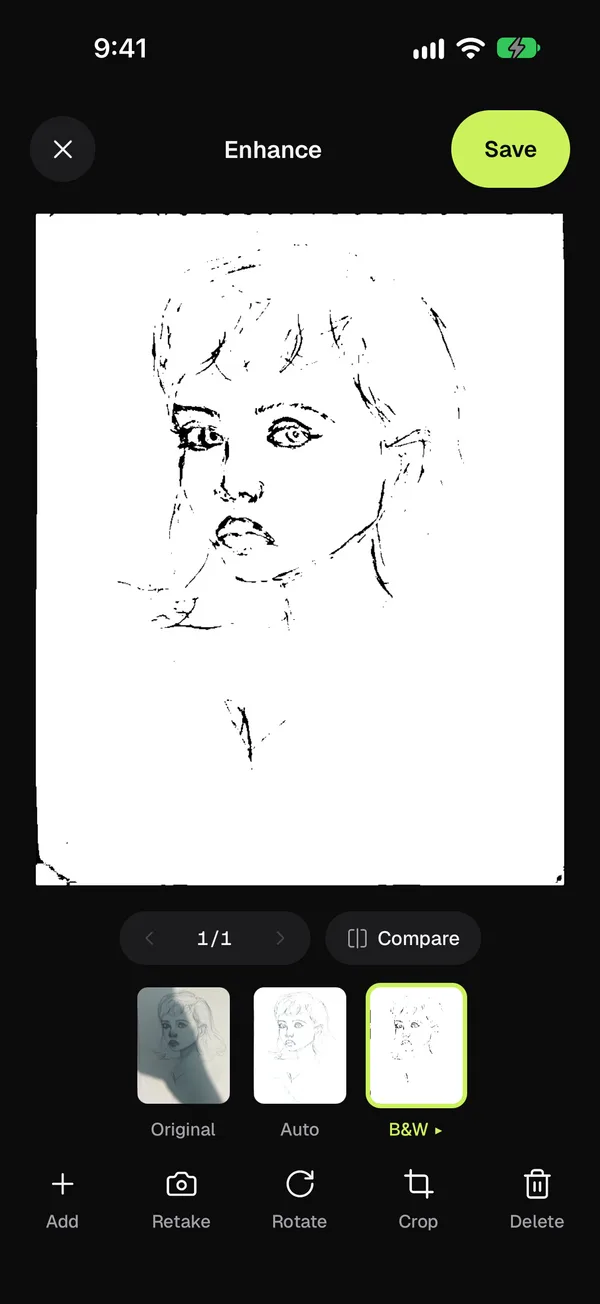
Copier finds the edges of the paper, straightens it, and lets you pick Original, Auto or B&W on the Enhance screen, with a preview of each. The two screenshots below are the same pencil sketch, shot under a hard shadow, in both cleanup looks.
Tap the picked look again for a strength slider, and hold Compare to see the page before its look. For a sketchbook, use Batch to go page to page, and turn off Apply to all pages if some pages are ink and some are pencil. Copier keeps each page’s original photo, so you can change the look again after saving. It runs on your device without an account, and sharing as JPG is free.
Scanning artwork bigger than the scanner
There are two ways to handle a piece that won’t fit.
- Photograph it whole. Hang it or lay it flat, stand back, and zoom in slightly (2x on most phones) to reduce lens distortion at the edges. Keep the phone parallel. This is fastest and works for anything up to wall size.
- Scan or photograph it in sections. Cover the piece in overlapping tiles, with a quarter to a third of each tile overlapping the next, then stitch them together with Photoshop’s Photomerge or the free panorama tool Hugin. Keep the light and exposure the same for every tile.
Photographing paintings and textured work
Canvas, thick acrylic, oil and collage aren’t flat, and scanner glass or a cleanup filter fights that. Photograph them instead:
- Put two equal lights at 45 degrees on either side, at the same height as the center of the painting. That evens out the light and keeps glare off.
- For very glossy varnish, move the lights further out to the side or diffuse them with white fabric.
- Shoot with no filter, then correct the white balance on a copy using a white or gray card held next to the painting in one test shot.
Professional art photographers go further with polarizing filters on both lights and lens, which removes almost all glare. For a portfolio or prints of your own work, the two-light setup is usually enough.
Tips before you share or print
- Keep the untouched scan and edit a copy.
- Sign or date the piece before scanning, so the signature is in the file.
- Scan at the size you’ll need. You can always make a scan smaller, but you can’t add detail later.
The same lighting habits help with every scan: see how to get clean scans. If you’re scanning class sketches or notes, how to scan handwritten notes has more on pencil. And for choosing between looks generally, black and white vs color scans and JPG vs PNG for scans cover the trade-offs.
Questions
What DPI should I scan artwork at?
Use 300 dpi for sharing online, 600 dpi if you want to make prints at the original size or larger, and 600 to 1200 dpi for line art you plan to clean up or turn into vector shapes.
How do I scan a pencil drawing without losing light lines?
Avoid pure black and white modes, which drop faint strokes. Use a color or grayscale scan that whitens the paper but keeps the grays, and check the lightest lines before you save.
How do I scan art that's bigger than my scanner?
Either photograph the whole piece in one shot from a distance with even light, or scan it in overlapping sections and stitch them together with Photoshop's Photomerge or the free Hugin.
Is it better to scan or photograph a painting?
Photograph it. Canvas and thick paint don't lie flat on scanner glass, and a camera on a stand with two lights at 45 degrees handles texture and size better.