 COPIER
How to Scan on a Chromebook (Camera, Scanner or Web)
How to scan on a Chromebook: open the Camera app, select Scan at the bottom, choose Document, hold the page in view and press the shutter. You can save it as a photo or a PDF, and it lands in the Files app under My files, then Camera. If you have a printer with a scanner, the built-in Scan app works with that too.
Each method is below, step by step, with what to do when the Chromebook’s camera points the wrong way.
Scan with the Chromebook Camera app
The Camera app has had a document scanner since Chrome OS 96. These steps follow Google’s Chromebook help page.
- Open the Camera app from the Launcher.
- At the bottom, choose Scan, then Document.
- Place the page inside the viewfinder. When the Camera detects it, press the shutter button.
- Select Save as photo or Save as PDF. If part of the page is cut off, select Retake.
For a document with several pages:
- Scan the first page, but select Multi-page instead of saving.
- Scan each remaining page. Remove a bad one with the Trash icon.
- Select Save as PDF.
Save as photo only works for a single page. Everything you save goes to My files, then Camera, in the Files app.
If there’s no Scan option in your Camera app, the Chromebook is probably out of date. Go to Settings, then About ChromeOS, and select Check for updates. School and work Chromebooks may have the camera limited by the administrator, in which case ask them.
Getting a good scan from a laptop camera
Most Chromebooks only have a camera above the screen, which points at you, not the desk. You have to hold the page up to it:
- Hold the page upright, facing the screen, not tilted back. Scans come out badly when the page is sideways or at a steep angle.
- Use a page and background of different colors, so the edges are easy to find.
- Face a window or a lamp so the page is lit from the front. A light behind the page makes it dark and lets print from the other side show through.
- If your Chromebook is a tablet or convertible with a back camera, use that, and lay the page on the table.
A USB webcam on a stand pointing down is a cheap fix if you scan from a Chromebook every day. Scanning documents with a webcam has more tips for laptop cameras.
Scan with a printer or scanner
If you have a scanner, or a printer that scans, the Scan app handles it. Google’s scanner setup page has the details.
- Make sure the Chromebook and the scanner are on the same network. Bluetooth scanning isn’t supported.
- Open the Launcher and search for Scan, or go to Settings, then Printers and scanners, and select Scan.
- Under Scan, pick your scanner from the menu.
- Choose the source (flatbed or document feeder, if it has one), the folder in Scan to, and the file type.
- Open More settings to change the color mode, page size and resolution.
- Select Scan. When it’s done, select Show file location to open the folder.
The resolution and file type you can pick depend on the scanner. For text, 300 dpi is plenty; best DPI for scanning documents explains when to go higher.
Scan in Chrome with a web app
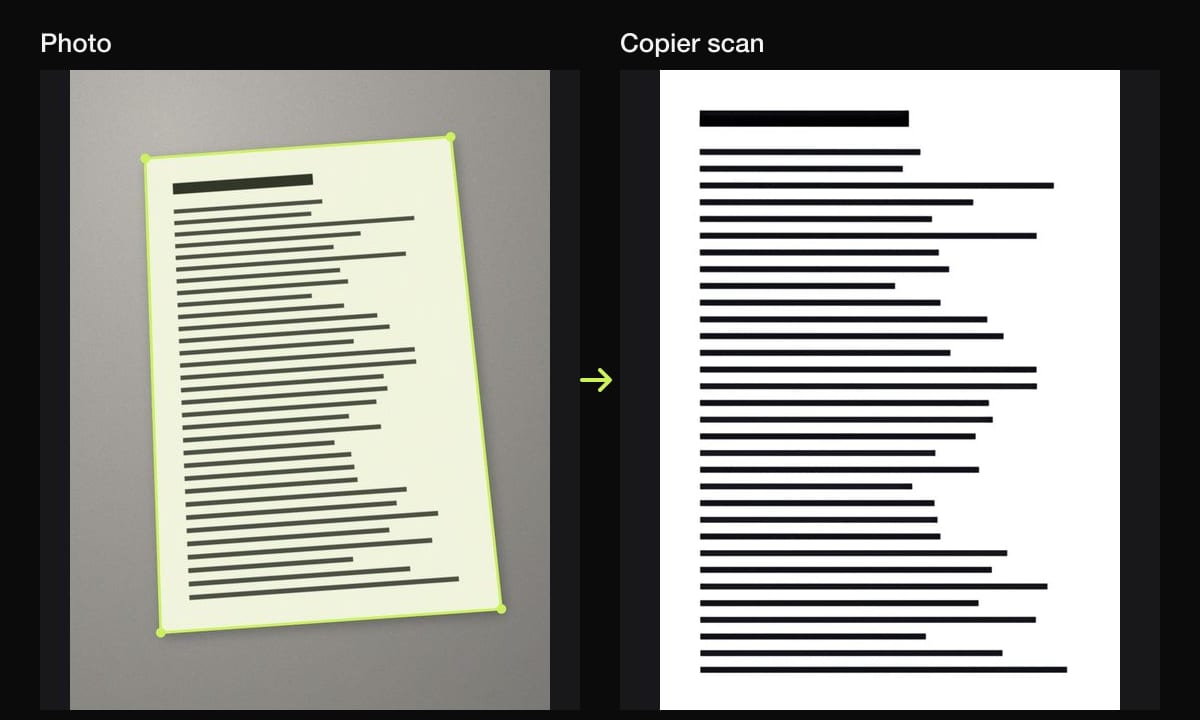
A scanner web app runs in Chrome like any website, using your camera through the browser. Copier in your browser is one. It finds the page in the camera view and outlines it as you point at it, takes it once you’ve held still for about a second with Auto on, then cuts it out, straightens it and cleans it up.
Everything happens in the browser on your Chromebook: there’s no account, and the pages are not uploaded. You can install it from Chrome’s address bar so it opens like an app, and after the first visit it works offline.
You can also import photos you’ve already taken. Pick a look for each document (Auto for most papers, Black & white for text, Original for photos), then share pages as JPG, which is free for up to 10 documents, or as a PDF with Copier Pro, a one-time lifetime purchase. Copier doesn’t recognize text yet; if you need that, the Camera app’s text detection can copy text from the camera preview.
Copier also has an Android app, which Chromebooks that run Android apps can use instead.
Which Chromebook scanning method to use
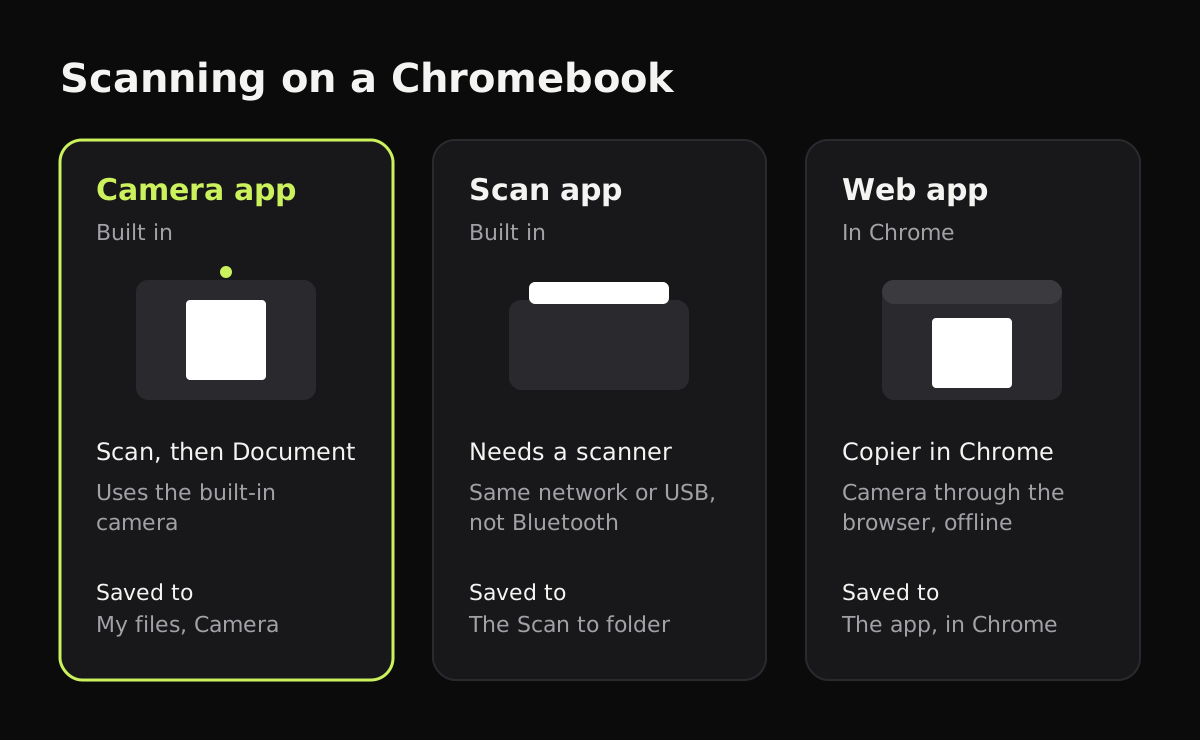
A summary of what each method needs and gives you:
| Method | Needs | Multi-page PDF | File types | Saved to |
|---|---|---|---|---|
| Camera app, Scan | Built-in or USB camera | Yes, Multi-page | PDF, or JPG for one page | My files, Camera |
| Scan app | A scanner on your network | Depends on the scanner | Set in the app | The Scan to folder |
| Copier in Chrome | A camera and Chrome | Yes, with Copier Pro | JPG, PDF | The app, in the browser |
Use the Camera app for the odd form or homework sheet. Use a real scanner for long documents, photos and anything that needs fine detail. If you hold pages up to the front camera a lot, a scanner web app that straightens and cleans pages makes the results much easier to read. For school work specifically, see how to scan homework.
Questions
Where do scanned documents go on a Chromebook?
Scans from the Camera app are saved in the Files app under My files, then Camera. Scans from the Scan app go to the folder set in Scan to; select Show file location after scanning to open it.
Can a Chromebook scan multiple pages into one PDF?
Yes. In the Camera app's Scan mode, select Multi-page after the first page instead of saving, scan the rest, then select Save as PDF.
Why can't my Chromebook find my scanner?
The Chromebook and the scanner need to be on the same network, and Chromebooks don't support scanning over Bluetooth. Restart the scanner, check it's on the same Wi-Fi, and try again from the Scan app.
Can I scan with the front camera on a Chromebook?
Yes. The Camera app scans with either the front or the back camera. The back camera, or a USB webcam, is easier because you can point it down at a page on the desk.