 COPIER
How to Scan Photos: Phone, Flatbed or Service
To scan photos, you have three good options: a flatbed scanner at 600 dpi for the best detail, your phone’s camera for speed, or a scanning service when you have boxes of prints. For a single picture, your phone is enough if you kill the glare and keep the colors as they are. For prints you want to enlarge or archive, use a flatbed.
The method matters less than three habits: clean prints, no reflections, and no “document” filter that turns faces into flat white paper.
Phone vs flatbed vs scanning service
This compares the three ways to scan a photo by what you get and what it costs you in time.
| Method | Detail | Speed | Glare risk | Best for |
|---|---|---|---|---|
| Phone camera | Good: a 12 MP phone puts about 670 pixels across each inch of a 4x6 print that fills the frame | Seconds per photo | High on glossy prints | Sharing, quick family archives, prints stuck in albums |
| Flatbed scanner | Best: true 600 to 1200 dpi with even light | 1 to 3 minutes per scan | None | Prints you’ll enlarge, restore or keep for good |
| Scanning service | Usually 300 to 600 dpi, depending on the order | Weeks, but no work for you | None | Hundreds or thousands of loose prints |
Phone numbers are optimistic. A phone lens and sensor won’t resolve fine grain the way a flatbed does, so 670 pixels per inch on paper isn’t the same as a 670 dpi scan. It’s plenty for screens and normal-size reprints. With the print filling the frame, the phone uses about 4032 × 2688 of its pixels on the photo, about 10.8 MP.
What DPI to scan photos at
DPI (dots per inch) sets how many pixels you get from each inch of the print. The table shows what each setting gives you for common print sizes.
| Print size | 300 dpi | 600 dpi | 1200 dpi |
|---|---|---|---|
| Wallet, 2.5 × 3.5 in | 750 × 1050 px (0.8 MP) | 1500 × 2100 px (3.2 MP) | 3000 × 4200 px (12.6 MP) |
| 4 × 6 in | 1200 × 1800 px (2.2 MP) | 2400 × 3600 px (8.6 MP) | 4800 × 7200 px (34.6 MP) |
| 5 × 7 in | 1500 × 2100 px (3.2 MP) | 3000 × 4200 px (12.6 MP) | 6000 × 8400 px (50.4 MP) |
| 8 × 10 in | 2400 × 3000 px (7.2 MP) | 4800 × 6000 px (28.8 MP) | 9600 × 12000 px (115.2 MP) |
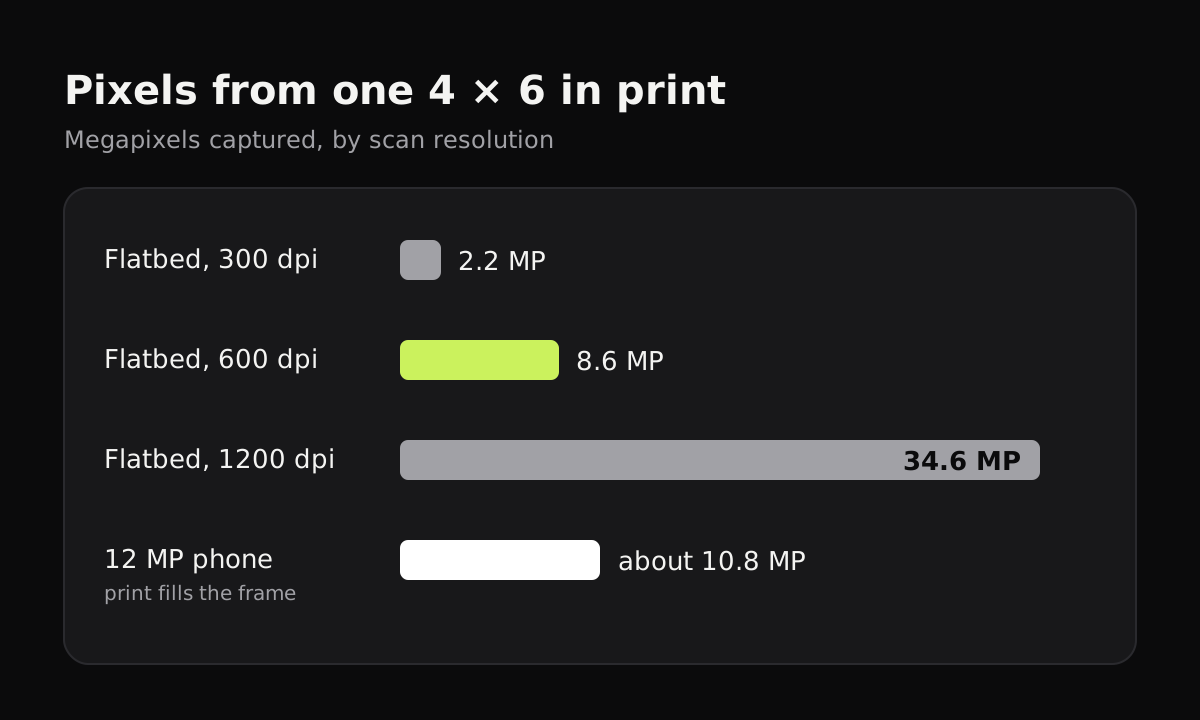
A quick rule: 600 dpi for normal prints, 1200 dpi for small ones you may enlarge, 300 dpi only when you just want something to post or text. Printers usually print photos at around 300 pixels per inch, so a 600 dpi scan of a 4x6 reprints well at twice the size, 8x12.
Going higher than 1200 dpi rarely helps with prints. Photo paper doesn’t hold much more detail than that, and you mostly capture the paper’s texture.
How to scan a photo with a flatbed scanner
- Wipe the glass and the print with a soft, dry microfiber cloth.
- Place the photo face down near a corner of the glass. You can fit several small prints at once and crop them apart later.
- In the scanning software, choose Photo or color mode rather than document mode, and set the resolution.
- Turn off automatic “sharpen” and “descreen” options if the results look crunchy.
- Save as JPG at high quality, or TIFF if you plan to restore the photo.
On a Mac, Image Capture and Preview both scan from a connected scanner. On Windows 11, the Windows Scan app saves scans as JPEG, PNG, TIFF or Bitmap, according to Microsoft’s scanner guide.
How to scan a picture with your phone
The camera is the fastest way, and the main enemy is reflection.
- Turn the flash off. It makes a bright spot on any glossy print.
- Use soft, even light. Daylight from a window to the side, or two lamps on opposite sides at an angle, works well. Avoid a ceiling light right above you.
- Put the print on a dark, plain surface so the edges stand out.
- Hold the phone straight above the photo, parallel to it, and close enough that the print fills most of the screen.
- Tilt a few degrees if you see a reflection. A scanner app corrects the perspective, so a slight angle doesn’t cost anything.
- Keep the colors as they are. Document filters whiten paper and boost contrast. On a photo that means blown-out skies and chalky faces.
Google’s free PhotoScan app takes several shots of the same print and combines them to remove glare. It hasn’t had a major update in a long time, so it may not run on every new phone.
Scanning photos with Copier
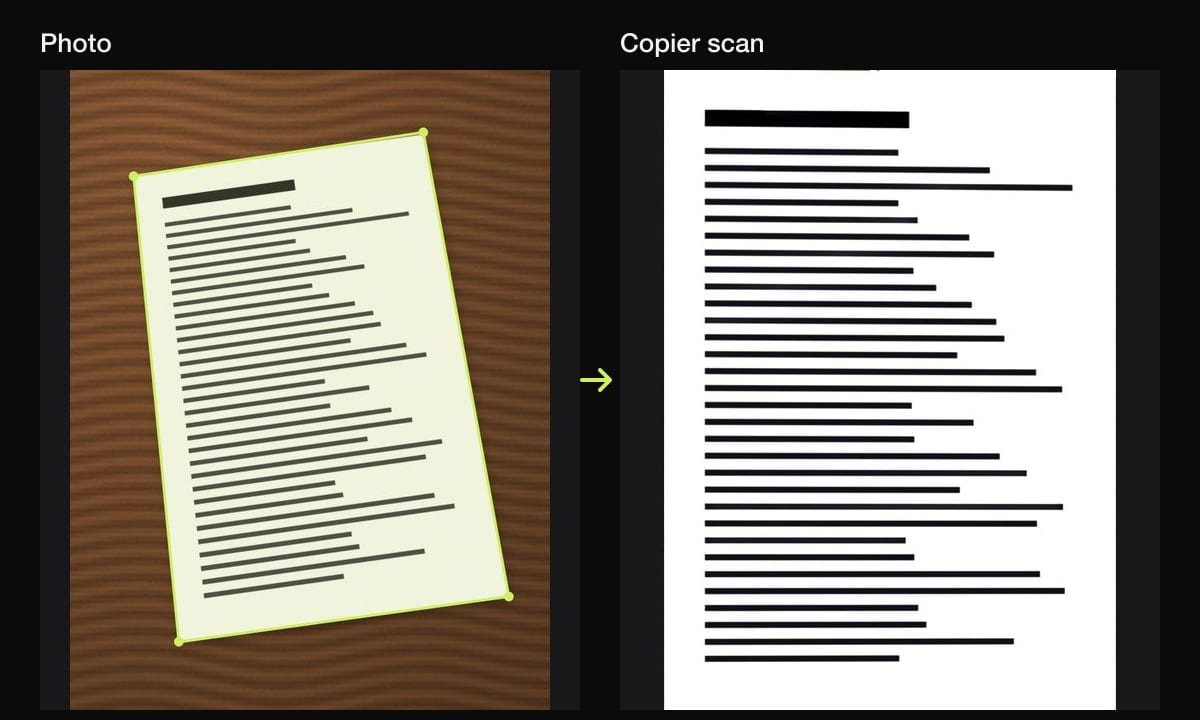
Copier finds the print’s edges and straightens it, and its Original look keeps the colors exactly as the camera saw them. Pick Original on the Enhance screen; Auto is for documents and makes the background white. You can also import photos you’ve already taken of prints. If a dark print on a dark table isn’t outlined correctly, open Crop and drag the corners into place. Copier works on the phone itself with no account, and shares pages as JPG for free.
For more on iPhone specifics, see how to scan photos on iPhone.
Scanning photos still in an album
Old albums are where most family photos live, and they come with problems:
- Plastic sleeves reflect light. Lift the sleeve if it peels back easily; otherwise light from a low side angle and tilt the phone.
- Self-adhesive “magnetic” pages from the 1970s and 1980s can hold prints so tightly that pulling them tears the back. Scan those in place.
- When several photos share a page, take each print separately so it fills the frame. One shot of the whole page gives each photo only a fraction of the pixels.
- Captions written on the page are worth keeping. Take one extra shot of the full page so you know which photos sat together, and copy names and dates into the file names.
Using a photo scanning service
Mail-in services and local photo shops scan large batches. Before you send irreplaceable prints, ask what resolution they scan at, whether you get JPG or TIFF files, whether they return your originals, and how the box is shipped and insured. Keep a list of what you sent.
Which way to scan your photos
- A few prints to share today: phone, flash off, original colors.
- A family archive you’ll keep: flatbed at 600 dpi, 1200 dpi for small prints.
- Instant photos need slightly different handling. See how to scan Polaroids.
- Negatives are a different job again, covered in how to scan film negatives with your phone.
Whichever way you go, name files with the year and the people in them (“1987 Grandma and Lily, beach”), and keep a second copy on another drive or cloud account in case the phone is lost. If the files are too big to send, JPG vs PNG for scans explains the trade-off.
Questions
What DPI should I scan photos at?
Scan ordinary 4x6 and 5x7 prints at 600 dpi. Use 1200 dpi for small prints such as wallet photos that you may want to enlarge, and 300 dpi only for quick sharing.
Can I scan a photo with my phone?
Yes. Lay the print flat in soft, even light, turn off the flash, hold the phone straight above it and keep the original colors. For prints you want to enlarge a lot, a flatbed scanner captures more detail.
How do I scan a picture without glare?
Turn the flash off, light the print from the side with two lamps or a window, and tilt the phone slightly so reflections slide off the picture. Scanning prints out of their plastic album sleeves helps too.
Should I take photos out of the album to scan them?
If they come out without tearing, yes, because album plastic adds glare. Old self-adhesive albums can damage prints if you pull them, so scan those photos in place.
What file format is best for scanned photos?
JPG at high quality is fine for sharing and most archives. TIFF or PNG keep every detail with no compression, at the cost of much larger files.